This is the first group of "before" photos. I've included a brief commentary on each picture. Looking at it, you'll be wondering what the hell was I thinking to take on this project. Well, if you wondered that, I have to say you have no vision of the possibilities. It'll look good when done. Trust me. I haven't included ALL of the pictures, as that would take forever to look at. I only have the most important ones shown here, to give you an idea of the scope of the project.
Group 2 will be coming later tonight or tomorrow.
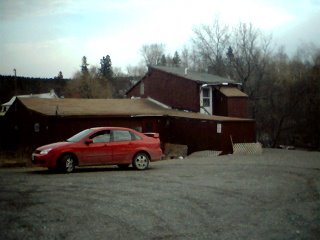
1_001 - Exterior view, facing southeast. This gives you a view of the western addition off of the original structure, plus the other additions on the west side of the building. You can also see the "second story," which was essentially perched on the roof of the original structure. The car is there just to look good.

1_002 - The parking lot, facing south. Almost half of this area will be scraped down about 2 inches and have new soil put in its place. This will at least have grass on it. The embankment heading down to the river (in the background) will have its slope reduced using the dirt scraped from the driveway. The embankment will also get a layer of topsoil, plus some grass and bushes to reduce soil erosion.

1_003 - The southern and second floor additions, facing east, including the part of the parking lot that will become a "lawn." What a mess. The southernmost extensions will be demolished and a porch put in their place.

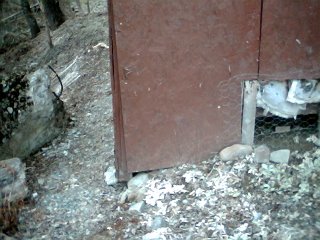
1_004 - A closer view of the southern extensions, facing east. You see how the extensions are propped up. These stacks of gazinta (cinder) blocks will be replaced using 4x6 or 4x8 posts, driven (or buried) into the ground about 3-4'; each post being 4-6' apart.
1_005 to 1_009 - Images of where the posts here are going. We don't need to see those pics.

1_010 - The roof structure on the southern extensions. Some, if not all of it, is going bye-bye. I might keep the roof on the southeast extension, in case I someday want to close it in proper for a greenhouse or something. Or just as a spot to escape the mosquitoes.
1_011 - Southeast corner (southern post #6). The southeast (and southwest) extensions are all about 3' wide. I will further extend this section (after the walls and roof are gone) another 1-3'. Since I don't want to disturb the embankment as much as possible, the porch will be cantilevered. Where southern posts #1-6 are will be where most of the weight is supported. I may have to put diagonal braces from the edge of the new porch to each of the southern posts.
1_012 - 1_017 - More post locations on the east side of the building.

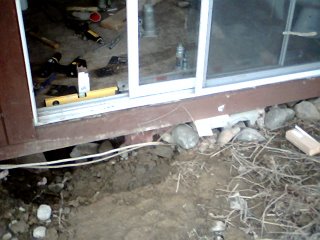
1_018 - Northeast post #3. You can see where I've already done some digging. I've been jacking the building at this point, and shimming on the gazinta block just to the left of the hole. This place will need to be braced together, as it is a joint between the "bathroom" and the alcove that holds the stove.
1_019 - Northeast post #4. The post will go where the gazinta block is now, just below the very middle of the sliding door (which will be removed).

1_020 - Northeast post #5 -- the northeast corner. Strangely enough, I don't think this part has heaved much at all. In fact, the entire north face has proved to be very stable. The entire floor is level (mostly) for the entire length.

1_023 - My 'handiwork' at trying to fix the leaking roof. Smack dab in the middle of the picture, you can see where the extension was added. Where the old roof for the extension (sloping TOWARDS the joint) meets the roof for the original structure is where all the water leaks in. I had a friend help me here...we tried to put a new roof on, sloping the right way, then just flashed and tarred the joint. No good. Both roofs here will be removed. The old roof for the extension will be sawz-alled off, while the "newer" roof is slid back on to the roof of the main building. Then, the "newer" roof will be put back. The reddish line shows where the "newer" roof will be put (i.e. it shows the planned slope).
And finally...

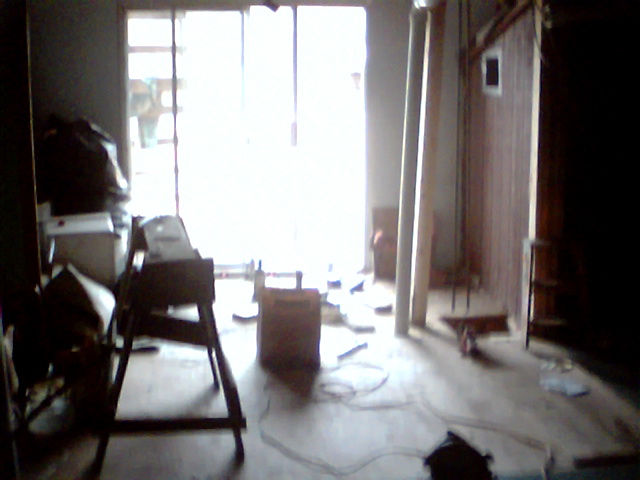
1_025 - Interior, facing east. The future "bathroom". Where the carpet has been removed defines the bounds of the new bathroom. There is a big hole in the floor just about mid-picture. This is where "interior northeast post #1" is going. The floor is sagging here, at the joint between the original structure (from where the photo was shot) and the "extension."